How to Install 10-Inch Pleated Filters Without Professional Help

Proper Tools Needed for Installing 10-Inch Pleated Filters
Installing 10-inch pleated filters in your HVAC system is a relatively simple task that can be done without the need for professional help. However, before you begin the installation process, it is important to ensure that you have the proper tools on hand. Having the right tools will make the installation process much smoother and more efficient.
One of the most important tools you will need for installing 10-inch pleated filters is a screwdriver. A screwdriver will be necessary for removing the old filter from your HVAC system and securing the new filter in place. Make sure you have both a flathead and a Phillips head screwdriver on hand, as different types of screws may be used in your HVAC system.
In addition to a screwdriver, you will also need a tape measure. This will be used to measure the dimensions of your current filter so that you can purchase the correct size replacement filter. It is important to ensure that the new filter is the same size as the old filter to ensure proper fit and function.
Another tool that will come in handy during the installation process is a pair of gloves. Gloves will help protect your hands from any dirt, dust, or debris that may be present in your HVAC system. They will also provide added grip when handling the filter, making it easier to install without dropping or damaging it.
Lastly, you may also want to have a flashlight on hand. This will help you see more clearly inside your HVAC system, making it easier to locate and access the filter. A flashlight can also help you identify any potential issues or obstacles that may be present during the installation process.
Once you have gathered all of the necessary tools, you can begin the installation process. Start by turning off your HVAC system to ensure your safety while working. Use your screwdriver to remove the screws holding the old filter in place, and carefully slide the old filter out of the slot.

Next, take your new 10-inch pleated filter and slide it into the slot, making sure it is positioned correctly and securely. Use your screwdriver to reattach the screws and secure the new filter in place. Double-check that the filter is properly installed and that there are no gaps or gaps around the edges.
After the new filter is securely in place, you can turn your HVAC system back on and enjoy improved air quality in your home. Remember to regularly check and replace your filters every 1-3 months to ensure optimal performance and efficiency.
In conclusion, installing 10-inch pleated filters in your HVAC system is a simple task that can be done without the need for professional help. By having the proper tools on hand and following the steps outlined above, you can easily replace your filters and improve the air quality in your home.
Step-by-Step Guide to Installing 10-Inch Pleated Filters
Installing 10-inch pleated filters in your HVAC system is a relatively simple task that can be done without the need for professional help. By following a few easy steps, you can ensure that your filters are installed correctly and functioning efficiently. In this article, we will provide you with a step-by-step guide on how to install 10-inch pleated filters in your HVAC system.
The first step in installing 10-inch pleated filters is to turn off your HVAC system. This is an important safety precaution that will prevent any accidents or injuries while you are working on the filters. Once the system is turned off, locate the filter compartment in your HVAC system. This compartment is usually located near the air handler or furnace.

Next, remove the old filter from the compartment. Carefully slide the filter out of its slot, taking care not to damage the filter or the surrounding components. Inspect the old filter for any signs of damage or excessive dirt and debris. If the filter is dirty or damaged, dispose of it properly and replace it with a new 10-inch pleated filter.
Before installing the new filter, make sure to check the direction of airflow indicated on the filter. Most pleated filters have an arrow that indicates the direction in which the air should flow through the filter. Make sure to install the filter with the arrow pointing in the direction of airflow in your HVAC system. This will ensure that the filter functions properly and efficiently.
Carefully slide the new filter into the filter compartment, making sure that it fits securely in place. Double-check that the filter is installed in the correct orientation with the airflow arrow pointing in the right direction. Once the filter is properly installed, replace the filter compartment cover and secure it in place.
After installing the new filter, turn on your HVAC system and check for any signs of air leaks or unusual noises. Listen for any unusual sounds coming from the system and check for any air leaks around the filter compartment. If you notice any issues, turn off the system immediately and double-check the filter installation.
Finally, make a note of the date when you installed the new filter. Pleated filters should be replaced every 1-3 months, depending on the level of dust and debris in your home. By keeping track of when you installed the filter, you can ensure that it is replaced on time to maintain optimal air quality in your home.
In conclusion, installing 10-inch pleated filters in your HVAC system is a simple task that can be done without professional help. By following the steps outlined in this article, you can ensure that your filters are installed correctly and functioning efficiently. Remember to turn off your HVAC system, remove the old filter, check the direction of airflow, install the new filter properly, and check for any issues before turning the system back on. By following these steps, you can enjoy clean and healthy air in your home for months to come.
Common Mistakes to Avoid When Installing 10-Inch Pleated Filters
Installing 10-inch pleated filters in your HVAC system is a relatively simple task that can be done without the need for professional help. However, there are some common mistakes that people make when installing these filters that can lead to inefficiencies in your system and potentially costly repairs down the line. In this article, we will discuss some of these common mistakes and provide you with tips on how to avoid them.
One of the most common mistakes that people make when installing 10-inch pleated filters is not properly measuring the size of the filter. It is important to ensure that the filter you are installing is the correct size for your HVAC system. Using a filter that is too small can allow dust and debris to bypass the filter, reducing its effectiveness. On the other hand, using a filter that is too large can restrict airflow, putting unnecessary strain on your system. Before purchasing a filter, be sure to measure the dimensions of your current filter or consult your HVAC system’s manual to determine the correct size.
Another common mistake that people make when installing 10-inch pleated filters is not properly sealing the filter in place. It is important to ensure that the filter is securely in place to prevent air from bypassing the filter. This can be done by checking that the filter is snugly fit into the filter slot and that any clips or fasteners are properly secured. Additionally, you may want to consider using weather-stripping or foam tape around the edges of the filter to create a tight seal.
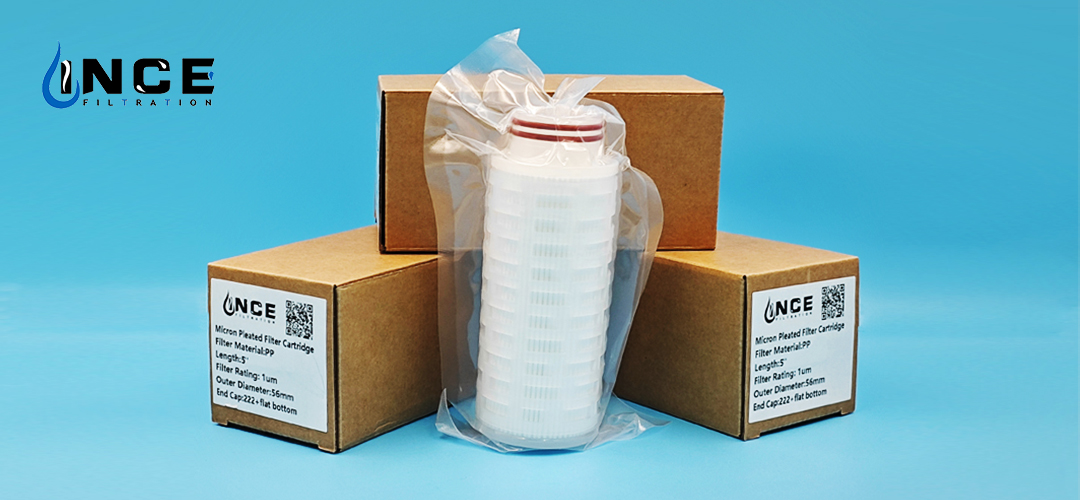
One mistake that is often overlooked when installing 10-inch pleated filters is not changing the filter regularly. It is recommended to change your filter every 1-3 months, depending on factors such as the size of your home, the number of occupants, and the presence of pets. A dirty filter can restrict airflow, reduce the efficiency of your system, and lead to increased energy costs. Additionally, a dirty filter can also lead to poor indoor air quality, exacerbating allergies and respiratory issues. To ensure that your system is running efficiently and effectively, be sure to change your filter regularly.
Finally, one common mistake that people make when installing 10-inch pleated filters is not properly disposing of the old filter. It is important to properly dispose of your old filter to prevent dust and debris from being released back into your home. Be sure to carefully remove the old filter, taking care not to shake or disturb it, as this can release trapped particles. Once removed, place the old filter in a plastic bag and seal it before disposing of it in the trash.
In conclusion, installing 10-inch pleated filters in your HVAC system is a simple task that can be done without professional help. By avoiding common mistakes such as not properly measuring the size of the filter, not sealing the filter in place, not changing the filter regularly, and not properly disposing of the old filter, you can ensure that your system runs efficiently and effectively. By following these tips, you can enjoy improved indoor air quality and lower energy costs.

